Red Velvet Lava Cupcakes : A Decadent Dessert with a Gooey Center
Introduction
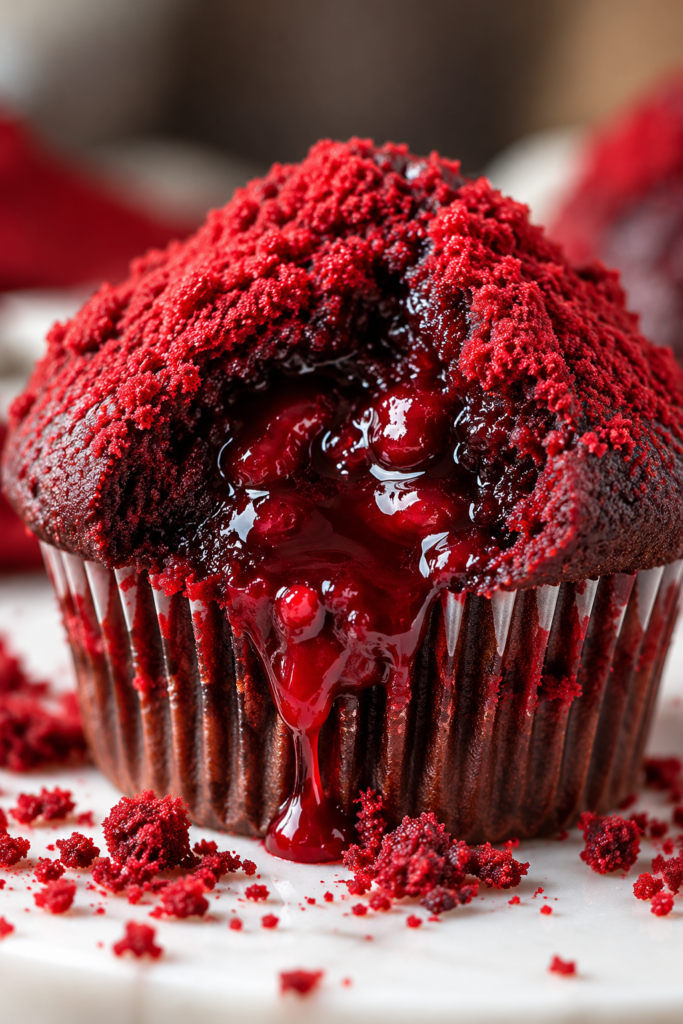
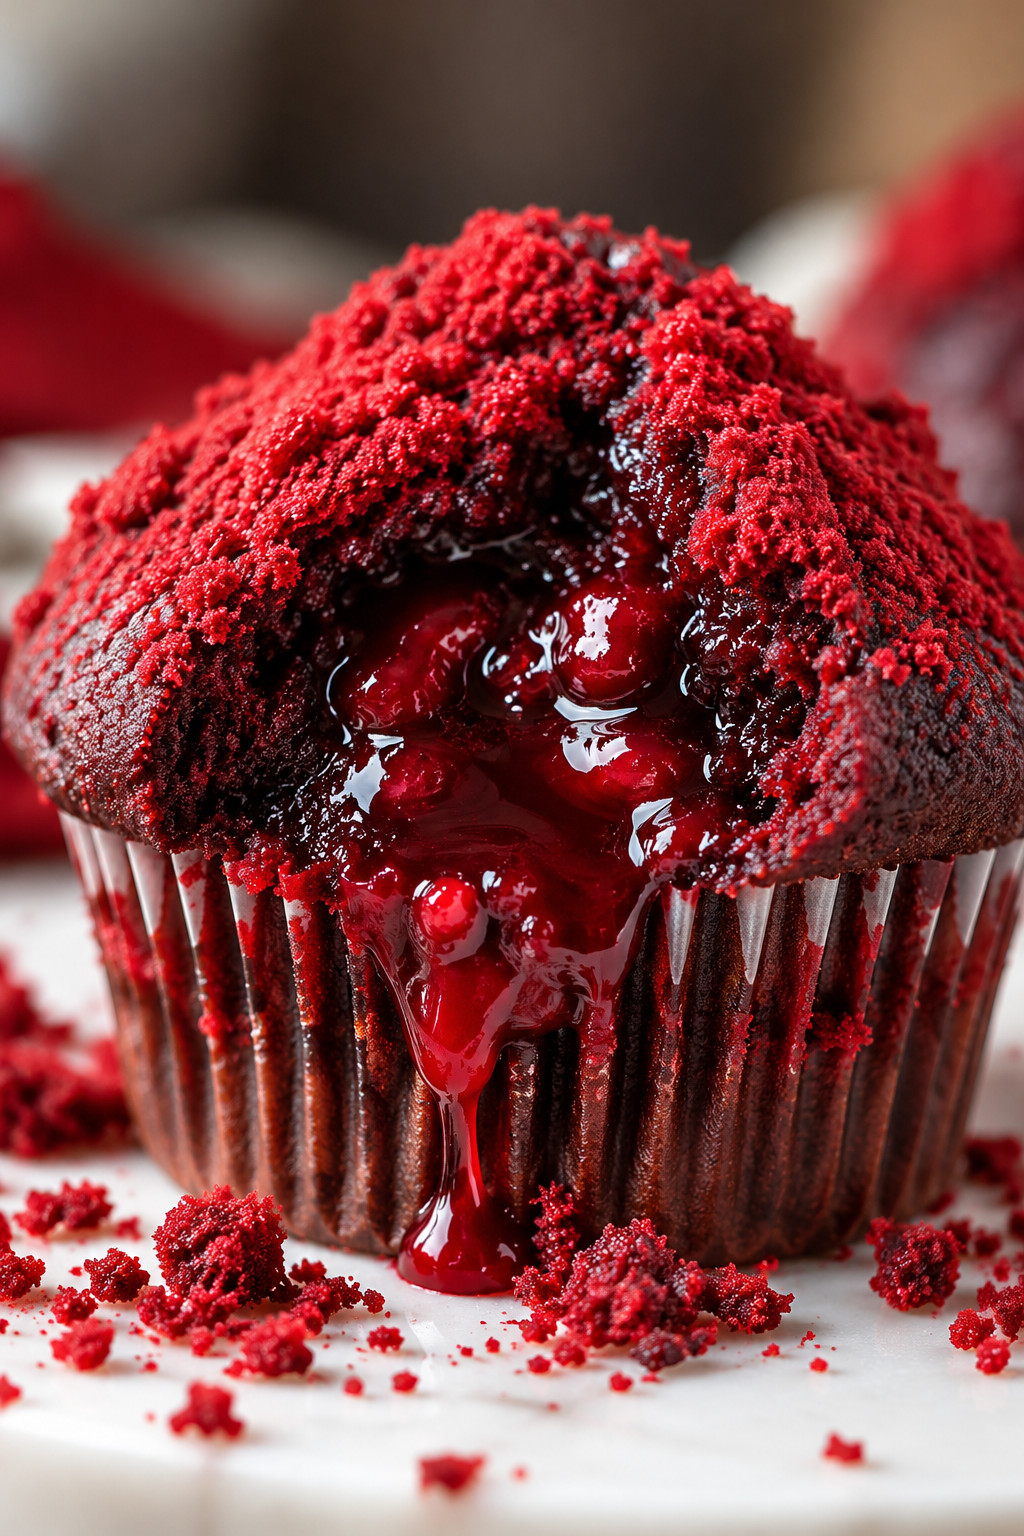
If you love the rich flavor of red velvet cake and the irresistible surprise of a warm, molten chocolate dessert, these Red Velvet Lava Cupcakes are the perfect treat. With their vibrant red color, soft cocoa-infused crumb, and luscious melted chocolate center, these cupcakes combine the elegance of red velvet with the indulgence of a classic lava cake.
Every bite offers a delicious contrast of textures. The outside is tender and moist, with the subtle chocolate flavor and hint of tanginess that make red velvet so distinctive. Inside, a warm, gooey filling melts into the cake, creating a rich center that makes these cupcakes especially memorable.
These cupcakes are ideal for Valentine’s Day, birthdays, anniversaries, holiday celebrations, or whenever you’re craving a bakery-style dessert at home. Their beautiful red color makes them perfect for special occasions, while their individual portions make serving simple and convenient.
Whether you serve them warm with a dusting of powdered sugar, a swirl of cream cheese frosting, or a scoop of vanilla ice cream, Red Velvet Lava Cupcakes are a delicious way to turn an ordinary dessert into something extraordinary.
What Are Red Velvet Lava Cupcakes?
Red Velvet Lava Cupcakes combine two popular desserts: classic red velvet cake and molten lava cake.
Traditional red velvet cake is known for its soft texture, reddish color, mild cocoa flavor, and subtle tanginess. Lava cupcakes build on these qualities by adding a rich chocolate center that becomes soft and gooey when the cupcakes are served warm.
The cake batter typically includes flour, cocoa powder, butter or oil, sugar, eggs, buttermilk, vanilla, and red food coloring. A small amount of vinegar and baking soda can help create the characteristic red velvet texture and flavor.
The molten center can be made with chocolate ganache, a chocolate truffle, or a carefully prepared chocolate filling. As the cupcakes bake, the exterior sets while the center remains soft and indulgent.
The result is a beautiful individual dessert that looks like a classic red velvet cupcake on the outside but reveals a delicious chocolate surprise when opened.
Why You’ll Love These Red Velvet Lava Cupcakes
- Gooey chocolate center: Each cupcake hides a soft, rich filling that creates the signature lava effect.
- Classic red velvet flavor: Mild cocoa, vanilla, and a hint of tanginess create a balanced, bakery-style taste.
- Beautiful presentation: The vibrant red color makes these cupcakes perfect for celebrations.
- Individual portions: They’re easy to serve at parties, romantic dinners, and family gatherings.
- Customizable toppings: Add cream cheese frosting, powdered sugar, chocolate drizzle, or fresh berries.
- Perfect for special occasions: Their striking appearance makes them especially suitable for Valentine’s Day and anniversaries.
- Easy to enjoy warm: The contrast between the tender cake and molten center makes every bite delicious.
Recipe at a Glance
- Preparation time: 20–25 minutes
- Baking time: Approximately 12–16 minutes
- Cooling time: 5–10 minutes
- Total time: Approximately 40 minutes
- Yield: 10–12 cupcakes
- Difficulty: Easy to moderate
Baking time may vary depending on your oven, cupcake size, and the type of filling used.
The Secret to a Perfect Molten Center
The most important part of Red Velvet Lava Cupcakes is achieving a tender cake exterior with a soft, flowing center.
One reliable method is to prepare a thick chocolate ganache, chill it until firm, and place a small portion inside each cupcake before baking. The surrounding batter cooks and holds its shape, while the filling becomes soft and creamy.
Another option is to use a suitable chocolate truffle or chocolate center designed to soften during baking.
Avoid adding too much filling, as it can leak through the bottom or sides of the cupcake. Make sure the filling is enclosed by the batter so the molten center remains inside.
Baking time also matters. Overbaking can cause the center to become firm, while underbaking the surrounding cake can make the cupcakes difficult to handle. Begin checking them near the lower end of the recommended baking time.
Ingredients Overview
These cupcakes use familiar baking ingredients to create their signature red velvet flavor and chocolate-filled center.
1. All-Purpose Flour
Flour provides structure and helps the cupcakes hold their shape around the molten filling.
2. Unsweetened Cocoa Powder
A small amount of cocoa powder creates the mild chocolate flavor associated with red velvet without overpowering the other ingredients.
3. Granulated Sugar
Sugar sweetens the cake, contributes to its moist texture, and balances the cocoa flavor.
4. Butter or Vegetable Oil
Butter adds a rich flavor, while oil can help produce a particularly moist crumb. The choice depends on the desired texture.
5. Eggs
Eggs bind the ingredients together and provide structure as the cupcakes bake.
6. Buttermilk
Buttermilk adds a gentle tang and helps create the soft, tender texture associated with red velvet cake.
7. Red Food Coloring
Red food coloring gives the cupcakes their signature vibrant appearance. Gel coloring is often convenient because a small amount can provide strong color without adding much liquid.
8. Vanilla Extract
Vanilla enhances the cocoa flavor and adds warmth to the cake and filling.
9. Chocolate Ganache Filling
Chocolate and heavy cream create a rich, smooth center that becomes soft and gooey when the cupcakes are served warm.
10. Cream Cheese Frosting or Powdered Sugar
These optional toppings add a finishing touch. Cream cheese frosting complements the slight tanginess of red velvet, while powdered sugar keeps the presentation simple and elegant.
What Makes Red Velvet Lava Cupcakes Special?
Red Velvet Lava Cupcakes offer the best of two dessert styles in one small treat. The red velvet cake provides a tender, lightly chocolatey exterior, while the molten filling adds richness and an element of surprise.
Their individual size makes them easy to serve, and their striking color creates an impressive presentation without complicated decoration.
For the best experience, serve them slightly warm so the center remains soft. A little cream cheese frosting or a scoop of vanilla ice cream can make them even more indulgent.
Red Velvet Lava Cupcakes : Ingredients, Measurements, and Preparation Tips
Ingredients You’ll Need
This recipe makes approximately 12 Red Velvet Lava Cupcakes.
For the Chocolate Lava Filling
- 4 ounces (115 g) semisweet chocolate, finely chopped
- ¼ cup (60 ml) heavy whipping cream
- 1 tablespoon (14 g) unsalted butter
For the Red Velvet Cupcakes
- 1¼ cups (155 g) all-purpose flour
- 2 tablespoons (10 g) unsweetened cocoa powder
- ¾ cup (150 g) granulated sugar
- ½ teaspoon baking soda
- ¼ teaspoon salt
- 1 large egg, room temperature
- ½ cup (120 ml) buttermilk, room temperature
- ⅓ cup (80 ml) vegetable oil
- 1 teaspoon vanilla extract
- 1 tablespoon (15 ml) white vinegar
- 1–2 teaspoons red gel food coloring, or as needed
For the Optional Cream Cheese Frosting
- 4 ounces (113 g) cream cheese, softened
- 2 tablespoons (28 g) unsalted butter, softened
- ½ cup (60 g) powdered sugar
- ½ teaspoon vanilla extract
Choosing the Best Ingredients
Chocolate: Semisweet chocolate creates a rich filling that balances the sweetness of the cupcakes. Dark chocolate can be used for a more intense cocoa flavor.
Heavy cream: Heavy whipping cream gives the chocolate filling a smooth, creamy consistency. Avoid replacing it with water, which can make the ganache thin.
Cocoa powder: Use unsweetened cocoa powder to preserve the classic red velvet flavor without making the cake overly chocolatey.
Buttermilk: Buttermilk adds moisture and a slight tang. If you don’t have any, combine ½ cup (120 ml) milk with 1½ teaspoons lemon juice or white vinegar. Let it stand for 5–10 minutes before using.
Vegetable oil: Oil helps keep the cupcakes moist. A neutral oil, such as canola oil, works well.
Red food coloring: Gel coloring provides a vibrant red color without adding too much liquid. The amount needed depends on the brand and strength of the coloring.
Cream cheese: For the optional frosting, use full-fat block cream cheese for the smoothest, most stable result.
Easy Ingredient Substitutions
- Dark chocolate: Replace semisweet chocolate with dark chocolate if you prefer a less sweet center.
- Milk chocolate: Use milk chocolate for a sweeter, milder filling.
- Butter instead of oil: You can substitute melted butter for the vegetable oil, although the cupcakes may have a slightly different texture.
- Dairy-free option: Use suitable dairy-free chocolate, plant-based cream, and dairy-free milk alternatives. The texture may vary.
- Natural red coloring: Beet powder can provide some red color, although the final shade will be less predictable and may change during baking.
- No frosting: Skip the cream cheese frosting and finish with a light dusting of powdered sugar instead.
Essential Equipment
- A standard 12-cup muffin pan
- Paper cupcake liners
- Mixing bowls
- A whisk
- A rubber spatula
- Measuring cups and spoons or a kitchen scale
- A small saucepan or microwave-safe bowl
- A spoon or small cookie scoop
- A wire cooling rack
- An electric mixer, if preparing the frosting
Preparation Tips for Perfect Results
1. Prepare the Lava Filling First
Heat the heavy cream until steaming, then pour it over the chopped chocolate and butter. Let it stand for 2 minutes before stirring until smooth.
Refrigerate the ganache until firm enough to portion into small mounds. This makes it easier to place the filling in the center of each cupcake.
2. Bring the Ingredients to Room Temperature
Allow the egg and buttermilk to reach room temperature before mixing. This helps the batter combine evenly and reduces the risk of a dense texture.
3. Measure the Flour Carefully
Too much flour can make the cupcakes dry and heavy. For the most accurate results, use a kitchen scale. If measuring by cups, spoon the flour into the cup and level it without packing it down.
4. Avoid Overmixing the Batter
Whisk the dry ingredients together in one bowl and the wet ingredients in another. Combine them gently until no large streaks of flour remain.
Overmixing can develop too much gluten, resulting in cupcakes that are less tender.
5. Don’t Overfill the Cupcake Liners
Fill each liner approximately one-third full with batter, add a portion of the chilled filling, and cover with more batter until the liner is about two-thirds full.
The chocolate center should be enclosed completely so it doesn’t leak out during baking.
6. Watch the Baking Time
Begin checking the cupcakes around 12 minutes. The tops should look set, and a toothpick inserted into the cake portion—not the chocolate center—should come out without wet batter.
Avoid baking longer than necessary, as excessive baking can cause the filling to lose its gooey texture.
Can You Prepare Red Velvet Lava Cupcakes Ahead of Time?
Yes. Preparing the chocolate filling in advance can make baking day easier.
- Chocolate filling: Prepare the ganache up to 3 days ahead and refrigerate it in a covered container.
- Unbaked cupcakes: For the best texture, assemble and bake them shortly before serving.
- Baked cupcakes: Store cooled cupcakes in an airtight container in the refrigerator for up to 3 days.
- Reheating: Warm individual cupcakes briefly in the microwave, checking in short intervals to avoid overheating. The center may soften again, although results vary.
If the cupcakes contain cream cheese frosting, keep them refrigerated. Do not leave perishable cupcakes at room temperature for more than 2 hours.
Red Velvet Lava Cupcakes : Step-by-Step Instructions
Prepare the Chocolate Lava Filling
Place the chopped semisweet chocolate and butter in a heatproof bowl.
Heat the heavy cream in a small saucepan until steaming but not boiling. Pour the hot cream over the chocolate and let it stand for about 2 minutes.
Stir slowly until the chocolate melts completely and the mixture becomes smooth and glossy.
Transfer the ganache to the refrigerator for approximately 30–45 minutes, or until it is firm enough to portion into small mounds.
Divide the chilled ganache into 12 small portions. If it is still too soft to handle, refrigerate it for a little longer.
Tip: Preparing the filling first gives it time to firm up, making it easier to enclose inside the cupcake batter.
Preheat the Oven and Prepare the Pan
Preheat your oven to 350°F (175°C).
Line a standard 12-cup muffin pan with paper cupcake liners. If you don’t have liners, grease each cavity thoroughly with butter or nonstick baking spray.
Make sure the oven is fully preheated before baking so the cupcakes cook evenly.
Combine the Dry Ingredients
In a medium bowl, whisk together the all-purpose flour, cocoa powder, granulated sugar, baking soda, and salt.
Break up any lumps in the cocoa powder to ensure an even color and flavor throughout the batter.
Set the bowl aside while you prepare the wet ingredients.
Mix the Wet Ingredients
In a separate large bowl, whisk together the egg, buttermilk, vegetable oil, vanilla extract, white vinegar, and red food coloring.
Continue whisking until the mixture is smooth and evenly colored.
Start with 1 teaspoon of red gel food coloring and add more if necessary to achieve your preferred shade. The color may darken slightly during baking.
Make the Red Velvet Batter
Add the dry ingredients to the wet ingredients in two additions.
Stir gently with a whisk or rubber spatula until the flour is incorporated and the batter is smooth.
Avoid overmixing. A few tiny lumps are preferable to a tough cupcake caused by excessive stirring.
The finished batter should be thick enough to hold the filling while remaining easy to spoon into the cupcake liners.
Fill the Cupcake Liners
Spoon a small amount of red velvet batter into each liner, filling it approximately one-third full.
Place one portion of chilled chocolate ganache in the center of each cupcake.
Cover the filling with additional batter until each liner is about two-thirds full. Make sure the chocolate is completely enclosed.
Avoid overfilling the liners because the cupcakes need room to rise during baking.
Bake the Cupcakes
Place the muffin pan on the center rack of the preheated oven.
Bake for approximately 12–16 minutes, checking near the lower end of the range.
The cupcake tops should look set, and the cake surrounding the filling should be cooked through. A toothpick inserted into the cake portion should come out without wet batter; avoid testing directly through the chocolate center.
Remove the cupcakes from the oven as soon as they are ready. Overbaking can cause the chocolate center to become firmer rather than molten.
Let them rest in the pan for about 5 minutes before transferring them to a wire rack.
Prepare the Optional Cream Cheese Frosting
While the cupcakes cool slightly, prepare the frosting if desired.
In a mixing bowl, beat the softened cream cheese and butter until smooth and creamy.
Add the powdered sugar and vanilla extract. Beat on low speed until combined, then increase the speed briefly until the frosting is light and smooth.
If the frosting is too soft to pipe, refrigerate it for 15–20 minutes.
For the best molten effect, serve the cupcakes warm without frosting, or add a small amount of frosting just before serving. Heavy frosting can cover the cupcakes’ red color and make the dessert feel overly rich.
Finish and Serve
Arrange the cupcakes on a serving plate.
For a simple finish, dust them lightly with powdered sugar. Alternatively, pipe a small swirl of cream cheese frosting onto each cupcake once it has cooled slightly.
Serve the cupcakes warm so the chocolate center is soft and gooey. If they have cooled completely, warm an individual cupcake briefly in the microwave and check the center before serving.
Be careful when biting into a freshly warmed cupcake, as the chocolate filling may be hot.
Troubleshooting: Common Mistakes and How to Fix Them
Why Is My Chocolate Center Not Gooey?
The cupcakes may have baked for too long, or the ganache may be too firm.
Solution: Check the cupcakes early and avoid overbaking. If necessary, warm the cupcake briefly before serving to soften the filling.
Why Did the Filling Leak Out?
The ganache may not have been fully enclosed by the batter, or the cupcakes may have been overfilled.
Solution: Place the filling in the center and cover it completely with batter. Keep the liners no more than two-thirds full.
Why Are My Cupcakes Dry?
Too much flour or excessive baking can produce dry cupcakes.
Solution: Measure the flour accurately and check for doneness early. Remove the cupcakes as soon as the cake portion is cooked through.
Why Did My Cupcakes Sink?
Opening the oven door too early, underbaking, or using too much leavening can cause the cupcakes to sink.
Solution: Keep the oven door closed during the initial baking period and check the cupcakes near the end of the recommended time.
Why Is the Red Color Too Dark?
Cocoa powder naturally darkens the batter, and some food colorings produce a deeper shade than others.
Solution: Use red gel coloring and adjust the quantity gradually. Avoid adding excessive cocoa powder, as it can change both the color and the texture.
How to Tell When Red Velvet Lava Cupcakes Are Ready
Your cupcakes are ready when:
- The tops look set and spring back gently when touched.
- The cake around the filling is cooked through.
- The cupcakes hold their shape when removed from the pan.
- The chocolate filling remains soft enough to create a gooey center when served warm.
Red Velvet Lava Cupcakes : Serving, Storage, Variations, and FAQs
How to Serve Red Velvet Lava Cupcakes
Red Velvet Lava Cupcakes are best enjoyed warm, when the chocolate center is soft and gooey. With a few simple additions, you can turn them into an impressive dessert for any occasion.
- With cream cheese frosting: Add a small swirl of cream cheese frosting for the classic red velvet combination of sweet and tangy flavors.
- With vanilla ice cream: Serve a warm cupcake with a scoop of vanilla ice cream. The cool, creamy ice cream pairs beautifully with the molten chocolate center.
- With powdered sugar: Dust the tops lightly with powdered sugar for a simple, elegant finish.
- With chocolate drizzle: Drizzle melted dark or white chocolate over the cupcakes for an extra indulgent presentation.
- With fresh berries: Serve with strawberries or raspberries to add a refreshing, slightly tart contrast.
- With whipped cream: Add a spoonful of freshly whipped cream for a light and creamy accompaniment.
For special occasions, arrange the cupcakes on a serving platter and decorate with chocolate curls or a few fresh berries.
How to Store Red Velvet Lava Cupcakes
Proper storage helps maintain the cupcakes’ moisture and flavor, although the molten center is best enjoyed shortly after baking.
At Room Temperature
Unfrosted cupcakes without perishable fillings can generally be kept in an airtight container for up to 2 days, depending on the filling and storage conditions. Because these cupcakes contain a dairy-based chocolate ganache, refrigeration is the safer choice for leftovers.
In the Refrigerator
Place the cooled cupcakes in an airtight container and refrigerate for up to 3 days.
If the cupcakes have cream cheese frosting, keep them refrigerated. Allow them to sit at room temperature briefly before serving, or warm them carefully if you want to soften the chocolate center.
In the Freezer
For longer storage, freeze the unfrosted cupcakes in a freezer-safe container for up to 2 months for the best quality.
- Allow the cupcakes to cool completely.
- Wrap them individually or place them in a single layer in a freezer-safe container.
- Thaw overnight in the refrigerator.
- Warm briefly before serving if you want a softer chocolate center.
Avoid freezing cupcakes with delicate cream cheese frosting when possible, as the frosting’s texture may change after thawing.
Delicious Variations to Try
1. White Chocolate Lava Cupcakes
Replace the semisweet chocolate filling with white chocolate ganache. The sweet, creamy center creates a beautiful contrast with the vibrant red velvet cake.
2. Raspberry Red Velvet Lava Cupcakes
Add a small spoonful of thick raspberry preserves alongside the chocolate filling. The fruity tartness balances the richness of the chocolate and creates a delicious red velvet variation.
3. Double Chocolate Red Velvet Cupcakes
Add a few mini chocolate chips to the batter and use dark chocolate ganache for the center. This version is perfect for anyone who loves an intense chocolate flavor.
4. Red Velvet Cupcakes with Cream Cheese Filling
Replace the chocolate ganache center with a small portion of sweetened cream cheese filling. This variation emphasizes the classic pairing of red velvet cake and tangy cream cheese.
5. Chocolate Hazelnut Lava Cupcakes
Use a small chilled portion of chocolate hazelnut spread as the center. The filling adds a smooth, nutty chocolate flavor that pairs beautifully with the cocoa-infused cake.
6. Mini Red Velvet Lava Cupcakes
Use a mini muffin pan to create bite-sized desserts. Reduce the baking time and begin checking early, since smaller cupcakes cook much faster than standard ones.
Frequently Asked Questions
Can I Make Red Velvet Lava Cupcakes Ahead of Time?
Yes. You can prepare the chocolate ganache in advance and refrigerate it until needed. For the best molten center, assemble and bake the cupcakes close to serving time.
Why Is My Chocolate Center Firm Instead of Gooey?
The cupcakes may have baked too long, or the filling may have cooled and firmed up.
Solution: Avoid overbaking and serve the cupcakes warm. Brief reheating can soften the center, although the result depends on the filling and how long the cupcakes were baked.
Can I Use Store-Bought Chocolate Truffles?
Yes, provided the truffles soften sufficiently when heated. Choose small pieces that fit comfortably inside the cupcake batter, and make sure the filling is fully enclosed.
Can I Make These Cupcakes Without Red Food Coloring?
Yes. The cupcakes will still taste delicious, although they will have a brown, cocoa-colored appearance rather than the traditional red velvet color.
Can I Use Natural Cocoa Powder?
Yes. Unsweetened natural cocoa powder works well in this recipe. Use the specified quantity to maintain the intended flavor and texture.
How Do I Keep the Cupcakes Moist?
Measure the flour carefully, avoid overmixing, and remove the cupcakes from the oven as soon as the cake portion is cooked through. Storing them in an airtight container also helps prevent them from drying out.
Can I Skip the Cream Cheese Frosting?
Absolutely. The chocolate lava center provides plenty of richness on its own. A light dusting of powdered sugar is an easy and attractive alternative.
How Can I Get a More Intense Red Color?
Use concentrated red gel food coloring and add it gradually until you reach your preferred shade. Keep in mind that cocoa powder naturally darkens the batter.
Final Thoughts
Red Velvet Lava Cupcakes combine the beautiful color and tender texture of classic red velvet cake with a rich, gooey chocolate center. They’re an excellent choice for Valentine’s Day, birthdays, celebrations, or any occasion when you want a dessert that feels both elegant and indulgent.
For the best results, prepare the chocolate filling ahead of time, avoid overmixing the batter, and watch the baking time carefully to preserve the molten center.
Serve them warm with cream cheese frosting, vanilla ice cream, or fresh berries for a delicious finishing touch. With their vibrant red exterior and irresistible chocolate center, these cupcakes are sure to become a favorite for chocolate lovers and red velvet fans alike.