
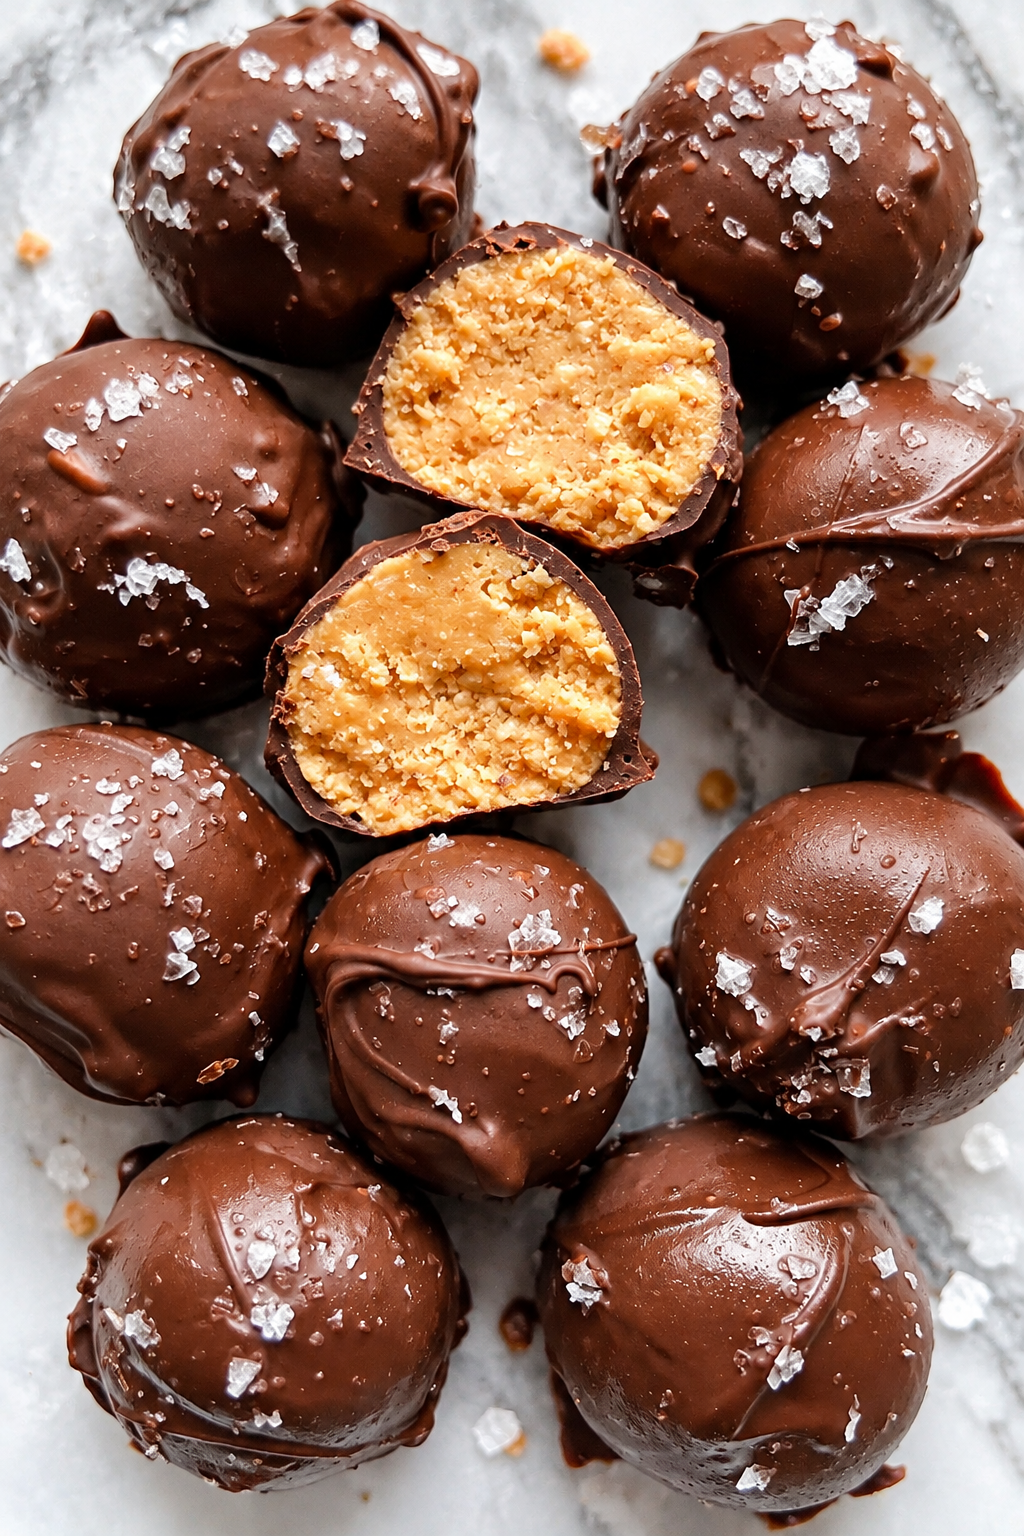
Peanut Butter Balls : Introduction, Ingredients Overview, and Why You’ll Love Them
Peanut Butter Balls
If you’re craving a sweet, creamy treat that combines rich peanut butter with a smooth chocolate coating, these Peanut Butter Balls are the perfect recipe to try. Made with a handful of simple ingredients, these bite-sized treats deliver the irresistible combination of nutty peanut butter, sweet powdered sugar, and decadent chocolate in every bite.
They’re easy to prepare, require no baking, and are perfect for holidays, parties, homemade gifts, or an everyday dessert. Whether you enjoy them straight from the refrigerator or serve them on a festive dessert platter, peanut butter balls are a classic treat that both kids and adults can enjoy.
One of the best things about this recipe is how simple it is. You don’t need special baking equipment or complicated techniques. Just mix the filling, shape it into balls, chill until firm, and dip each piece into melted chocolate.
The result is a delicious homemade candy with a creamy center and a satisfying chocolate shell.
What Are Peanut Butter Balls?
Peanut butter balls are small, round candies made from a sweet peanut butter mixture, usually combined with butter and powdered sugar. The filling is shaped into bite-sized portions, chilled, and coated in melted chocolate.
They are often associated with holiday candy-making, especially Christmas, when homemade chocolate-covered treats become popular gifts and party desserts.
Some versions resemble Buckeye candies, a traditional American confection featuring a peanut butter center with a partially exposed chocolate coating. Unlike classic Buckeyes, fully coated peanut butter balls are covered completely in chocolate.
Their appeal comes from the contrast between the smooth, creamy filling and the firm chocolate exterior. The peanut butter provides a rich, nutty flavor, while the chocolate adds sweetness and depth.
Because they require no oven time, these candies are also an excellent choice for beginners or anyone looking for a quick homemade dessert.
Why You’ll Love This Peanut Butter Balls Recipe
There are plenty of reasons to add these treats to your dessert collection.
- No-bake preparation: No oven is required, making this recipe convenient throughout the year.
- Simple ingredients: Peanut butter, powdered sugar, butter, and chocolate create a delicious combination.
- Creamy filling: The peanut butter center is smooth, rich, and sweet.
- Chocolate coating: A layer of melted chocolate adds a satisfying finish.
- Perfect for sharing: Their small size makes them ideal for parties, potlucks, and holiday dessert trays.
- Great for homemade gifts: Arrange them in decorative boxes or candy bags for a thoughtful homemade present.
- Easy to customize: You can adjust the chocolate coating or add simple toppings to suit your taste.
- Make-ahead friendly: Prepare them in advance and keep them chilled until you’re ready to serve.
These peanut butter balls are especially useful when you want an impressive-looking treat without spending hours in the kitchen.
Recipe at a Glance
- Preparation time: 20–30 minutes
- Chilling time: 30–60 minutes
- Total time: Approximately 1–1½ hours
- Yield: About 24–30 peanut butter balls
- Category: No-bake dessert, homemade candy
- Main ingredients: Peanut butter, butter, powdered sugar, and chocolate
- Difficulty: Easy
- Cooking method: No baking required
The total time may vary depending on the size of the balls and how quickly the filling firms up in the refrigerator.
Ingredients Overview
Each ingredient contributes to the flavor, texture, and structure of these homemade peanut butter balls.
1. Creamy Peanut Butter
Peanut butter is the main ingredient in the filling. It provides the characteristic nutty flavor and creates a rich, smooth center.
Conventional creamy peanut butter generally works best because it has a consistent texture and helps the filling hold its shape.
Natural peanut butter can also be used, but it may contain more separated oil and can make the mixture softer. If using it, stir it thoroughly before measuring and adjust the powdered sugar if necessary.
2. Unsalted Butter
Butter adds richness and helps create a smooth filling that melts pleasantly in your mouth.
Softened butter is easier to mix with peanut butter and powdered sugar. Using unsalted butter also allows you to control the overall saltiness of the recipe.
3. Powdered Sugar
Powdered sugar sweetens the peanut butter mixture while helping it become firm enough to roll into balls.
Its fine texture makes it ideal for no-bake candy recipes because it blends smoothly into the filling.
Add it gradually to achieve a consistency that is soft but not overly sticky.
4. Chocolate
Chocolate creates the delicious outer shell that makes these treats so appealing.
Semi-sweet chocolate is a popular choice because it balances the sweet filling. Milk chocolate produces a sweeter coating, while dark chocolate creates a richer contrast.
Chocolate chips or chopped chocolate can both work, although some chocolate chips contain stabilizers that make the coating thicker.
5. Coconut Oil (Optional)
A small amount of coconut oil can help thin the melted chocolate and create a smoother coating.
This ingredient is optional, and the amount needed depends on the chocolate you’re using. Add it gradually to avoid making the coating too thin.
6. Vanilla Extract (Optional)
A small splash of vanilla extract enhances the peanut butter flavor and adds warmth to the filling.
Although not essential, vanilla can give these homemade candies a more rounded flavor.
What Makes These Peanut Butter Balls So Good?
The secret to delicious peanut butter balls is the balance between the creamy filling and the chocolate coating.
The peanut butter provides a rich, nutty base, the powdered sugar adds sweetness and structure, and the butter creates a smooth texture. The chocolate shell completes the combination with a satisfying bite.
Chilling is also essential. It helps the filling become firm enough to dip into melted chocolate without falling apart.
For the best results, use a thick peanut butter mixture, keep the rolled balls chilled, and allow the chocolate coating to set completely before serving.
Peanut Butter Balls: Ingredients and Preparation Notes
These homemade Peanut Butter Balls require just a few simple ingredients to create a creamy peanut butter center covered in a smooth chocolate shell. Before starting, measure everything carefully and prepare a space in your refrigerator for chilling the candies.
Ingredients for Peanut Butter Balls
Yield: Approximately 24–30 balls | Preparation: 20–30 minutes | Chilling: 30–60 minutes
1. For the Peanut Butter Filling
- 1 cup (250 g) creamy peanut butter
- ¼ cup (57 g) unsalted butter, softened
- 2 cups (240 g) powdered sugar
- 1 teaspoon vanilla extract
- A pinch of salt, optional, depending on the peanut butter you use
These ingredients create a sweet, creamy filling that is easy to roll into bite-sized balls. The powdered sugar provides structure, while the butter adds richness and helps the filling hold together.
2. For the Chocolate Coating
- 12 ounces (340 g) semi-sweet chocolate chips or chopped chocolate
- 1–2 teaspoons coconut oil, optional
Semi-sweet chocolate provides a balanced flavor that complements the sweet peanut butter center. Coconut oil can help the chocolate melt into a thinner, smoother coating, making dipping easier.
If you prefer a sweeter candy, milk chocolate is also a good option.
Ingredient Substitutions
You can make a few adjustments based on your preferences and the ingredients available in your kitchen.
- Creamy peanut butter: Crunchy peanut butter can be used for extra texture, although the balls may be slightly less smooth.
- Unsalted butter: Salted butter works too; simply omit the additional salt.
- Semi-sweet chocolate: Milk chocolate creates a sweeter coating, while dark chocolate offers a more intense cocoa flavor.
- Coconut oil: You can omit it if your chocolate melts smoothly and has a suitable dipping consistency.
- Vanilla extract: This is optional, but it enhances the flavor of the filling.
- Powdered sugar: This ingredient is important for achieving the correct texture. Granulated sugar is not a direct substitute because it can leave the filling gritty.
For the most reliable results, use conventional creamy peanut butter rather than a very oily natural variety.
Equipment You’ll Need
Gather these basic kitchen tools before beginning:
- Large mixing bowl
- Electric hand mixer or sturdy mixing spoon
- Measuring cups and spoons or a kitchen scale
- Rubber spatula
- Baking sheet or flat tray
- Parchment paper or wax paper
- Small cookie scoop or tablespoon
- Microwave-safe bowl or heatproof bowl
- Fork or dipping tool
- Refrigerator
A small cookie scoop helps you make evenly sized balls, which makes chilling and chocolate coating easier.
Essential Preparation Notes
1. Use Softened Butter
Allow the butter to soften at room temperature before mixing. It should be easy to press with a finger but should not be melted.
Softened butter combines more easily with peanut butter and helps create a smooth filling.
2. Add the Powdered Sugar Gradually
Mix the peanut butter, butter, and vanilla first. Then add the powdered sugar in batches, mixing after each addition.
The finished mixture should be thick enough to roll without sticking excessively to your hands.
If it feels too soft, add a little more powdered sugar. If it becomes too dry or crumbly, mix in a small amount of peanut butter.
3. Chill Before Dipping
After shaping the balls, arrange them on a parchment-lined tray and refrigerate them for approximately 30–45 minutes.
Chilling helps the filling firm up, making it easier to dip without breaking apart or melting into the warm chocolate.
4. Melt the Chocolate Gently
Chocolate can burn if overheated. For the microwave method, heat it in short intervals of 20–30 seconds, stirring between each interval until smooth.
Alternatively, melt it in a heatproof bowl over a saucepan of gently simmering water, making sure the bowl does not touch the water.
Avoid introducing water into the chocolate, as even a small amount can cause it to seize.
5. Keep the Coating at the Right Temperature
The chocolate should be fluid enough to coat the balls but not so hot that it softens the filling immediately.
If the chocolate becomes too thick while dipping, warm it gently and stir again. Add a little coconut oil if needed, but do so gradually.
6. Let the Chocolate Set Completely
Place each coated ball back on the lined tray. Refrigerate until the chocolate shell is firm.
For a neat finish, allow excess chocolate to drip off the fork before placing each ball on the tray.
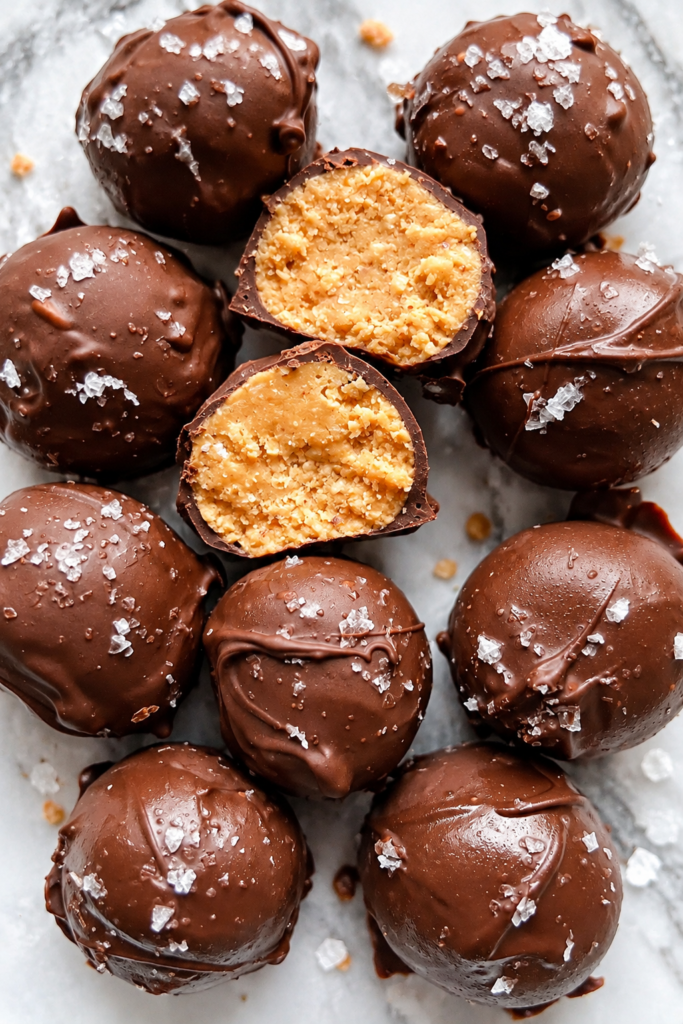
Peanut Butter Balls: Step-by-Step Instructions
Making Peanut Butter Balls at home is easy, even if you’ve never made homemade candy before. The process involves mixing a creamy peanut butter filling, shaping it into small balls, chilling until firm, and dipping each piece in melted chocolate.
Follow these simple steps to create smooth, delicious candies with a rich peanut butter center and a satisfying chocolate coating.
Prepare Your Baking Tray
Line a baking sheet or flat tray with parchment paper or wax paper.
Make sure the tray fits comfortably in your refrigerator, as the peanut butter balls need to chill before dipping.
Set the tray aside while you prepare the filling.
Mix the Peanut Butter and Butter
In a large mixing bowl, combine:
- 1 cup (250 g) creamy peanut butter
- ¼ cup (57 g) unsalted butter, softened
- 1 teaspoon vanilla extract
Beat the ingredients together with an electric mixer or stir vigorously with a sturdy spoon until the mixture becomes smooth and creamy.
Scrape down the sides of the bowl as needed to ensure everything is evenly incorporated.
If your peanut butter is particularly thick, give it a good stir before measuring so the consistency is uniform.
Add the Powdered Sugar
Gradually add 2 cups (240 g) of powdered sugar to the peanut butter mixture.
Mix after each addition until the sugar is fully incorporated. The filling will gradually become thicker and easier to handle.
Once all the powdered sugar has been added, check the consistency. It should be soft enough to shape but firm enough to hold its form.
If the mixture feels too sticky, add a little more powdered sugar. If it seems dry and crumbly, mix in a small amount of peanut butter until it comes together.
Taste the filling and add a small pinch of salt if desired.
Shape the Peanut Butter Balls
Scoop approximately 1 tablespoon of the mixture and roll it gently between your palms to form a smooth ball.
Place each ball on the prepared baking sheet, leaving a little space between them.
Repeat until all the filling has been used. Depending on the size of your portions, you should get approximately 24–30 balls.
For a more uniform appearance, use a small cookie scoop to portion the mixture evenly.
If the mixture begins sticking to your hands, refrigerate it for a few minutes before continuing.
Chill Until Firm
Place the tray in the refrigerator for 30–45 minutes, or until the peanut butter balls feel firm when gently touched.
This step is essential because firm centers are much easier to dip into melted chocolate.
If the balls are too soft, they may lose their shape or leave crumbs in the chocolate.
For a quicker option, you can place them in the freezer for approximately 15–20 minutes. Avoid leaving them frozen for too long before dipping, as very cold centers can sometimes cause condensation or cracking in the chocolate coating.
Melt the Chocolate
Place 12 ounces (340 g) of semi-sweet chocolate chips or chopped chocolate in a microwave-safe bowl.
Microwave in 20–30-second intervals, stirring thoroughly between each interval until the chocolate is smooth and fully melted.
If desired, stir in 1–2 teaspoons of coconut oil to make the chocolate thinner and easier to dip.
Alternatively, melt the chocolate in a heatproof bowl over a saucepan of gently simmering water. Stir until smooth, making sure no water or steam enters the chocolate.
Allow the chocolate to cool slightly if it feels very hot. It should remain fluid enough to coat the candies evenly.
Dip the Peanut Butter Balls
Remove a few chilled peanut butter balls from the refrigerator at a time, keeping the remaining ones cold.
Place one ball into the melted chocolate. Use a fork or dipping tool to turn it gently until fully coated.
Lift the ball out and allow excess chocolate to drip back into the bowl.
Carefully place it on the parchment-lined tray. Repeat with the remaining balls.
If the chocolate starts becoming too thick, warm it briefly and stir until smooth again.
Helpful tip: Avoid handling the centers too much while dipping. A fork or candy-dipping tool helps create a neater coating and prevents the chocolate from becoming messy.
Add Optional Decorations
If you want to decorate your peanut butter balls, add the toppings while the chocolate is still wet.
You can use:
- A light drizzle of melted white chocolate
- A small sprinkle of flaky sea salt
- Finely chopped peanuts
- A few chocolate shavings
Keep the decorations simple so the peanut butter and chocolate remain the main flavors.
For a classic look, leave the chocolate coating smooth and plain.
Chill Until the Chocolate Sets
Return the tray to the refrigerator for approximately 20–30 minutes, or until the chocolate coating is firm.
Once set, the candies should have a smooth outer shell and a soft, creamy peanut butter center.
If you notice small pools of chocolate around the bottoms, you can trim them away after the coating has hardened for a neater presentation.
Serve and Enjoy
Transfer the finished Peanut Butter Balls to a serving plate or an airtight container.
Serve them chilled for a firmer bite, or let them stand briefly at room temperature to soften the filling slightly.
These bite-sized treats are perfect for holiday dessert trays, parties, homemade gifts, or a quick sweet snack.
Tips for Perfect Peanut Butter Balls
- Use conventional creamy peanut butter: Its consistency helps the filling hold together.
- Soften the butter: This makes mixing easier and creates a smoother center.
- Add powdered sugar gradually: This helps you control the texture.
- Chill before dipping: Firm balls are easier to coat without falling apart.
- Melt chocolate gently: Overheating can make it thick or grainy.
- Use a fork for dipping: Allow excess chocolate to drip off before placing the balls on the tray.
- Keep the filling cold: Work in small batches if your kitchen is warm.
- Let the coating set completely: This creates a firm, attractive chocolate shell.
Troubleshooting Common Problems
Why Is My Peanut Butter Mixture Too Sticky?
The mixture may contain too much oil or not enough powdered sugar. Add powdered sugar a little at a time until the filling is easy to roll. Chilling it briefly can also make shaping easier.
Why Are My Peanut Butter Balls Crumbling?
The filling may be too dry because it contains too much powdered sugar. Mix in a small amount of peanut butter until the mixture holds together.
Why Won’t the Chocolate Stick Properly?
The balls may be too soft, or the chocolate may be too thick. Chill the centers until firm and ensure the melted chocolate is smooth and fluid before dipping.
Why Did My Chocolate Coating Crack?
Cracking can occur when very cold centers cause the chocolate to contract unevenly as it sets. Chill the balls until firm rather than freezing them for an extended period, and allow the melted chocolate to cool slightly before dipping.
Your homemade Peanut Butter Balls are now ready to enjoy. The creamy, sweet filling and smooth chocolate coating make these no-bake treats simple, delicious, and perfect for sharing.
Peanut Butter Balls: Serving, Storage, and Frequently Asked Questions
These homemade Peanut Butter Balls are a delicious combination of creamy peanut butter filling and smooth chocolate coating. Because they require no baking and use simple ingredients, they’re perfect for holiday celebrations, parties, homemade gifts, or an easy sweet treat whenever a craving strikes.
Once the chocolate has set, your peanut butter balls are ready to serve. Here are some helpful ideas for presenting, storing, and preparing them ahead of time.
How to Serve Peanut Butter Balls
Peanut Butter Balls are delicious straight from the refrigerator, but you can also serve them in several appealing ways.
1. Arrange Them on a Dessert Platter
Place the chocolate-covered balls on a decorative serving tray alongside brownies, cookies, chocolate truffles, or other bite-sized desserts.
Their smooth chocolate coating makes them an attractive addition to a dessert table.
2. Serve Them with Coffee
Pair these sweet candies with freshly brewed coffee or espresso. The slightly bitter flavor of coffee balances the sweetness of the peanut butter filling and chocolate shell.
3. Include Them in a Holiday Candy Box
Arrange the peanut butter balls in small paper candy cups and place them in a decorative box or tin.
They make thoughtful homemade gifts for friends, family, teachers, and neighbors during the holiday season.
4. Add Them to a Dessert Buffet
Serve them alongside cheesecake bites, chocolate-covered strawberries, cookies, and other small treats. Their bite-sized shape makes them convenient for guests to enjoy without utensils.
5. Enjoy Them as an Afternoon Treat
Keep a small portion refrigerated for a quick sweet snack after lunch or dinner. Their rich peanut butter center makes them satisfying in just a few bites.
How to Store Peanut Butter Balls
Proper storage helps maintain the creamy filling and firm chocolate coating.
Refrigerator Storage
Place the peanut butter balls in an airtight container once the chocolate has completely set.
Store them in the refrigerator for up to 2 weeks for best quality. Separate layers with parchment paper if you need to stack them to prevent the chocolate coating from sticking.
For the best texture, keep the container sealed to prevent the candies from absorbing odors from other foods.
Freezer Storage
Peanut Butter Balls freeze well, making them ideal for preparing ahead of holidays or special occasions.
To freeze them:
- Allow the chocolate coating to set completely.
- Arrange the balls in a single layer on a tray.
- Freeze until firm, then transfer them to a freezer-safe airtight container.
- Separate layers with parchment paper.
- Label the container with the date.
For the best quality, enjoy them within 2–3 months.
How to Thaw Frozen Peanut Butter Balls
Transfer the desired number of candies to the refrigerator and allow them to thaw gradually.
For a smoother appearance, keep them covered while thawing to reduce condensation on the chocolate surface. Once thawed, serve them chilled or allow them to soften slightly before eating.
Avoid repeatedly freezing and thawing the same batch, as this can affect the texture and appearance of the chocolate.
Make-Ahead Tips
These candies are particularly convenient when you want to prepare desserts in advance.
- Prepare the filling early: Mix and shape the peanut butter mixture, then refrigerate the balls until firm.
- Make them a day ahead: Dip the chilled centers in chocolate and refrigerate the finished candies overnight.
- Prepare them for holidays: Make a batch several weeks ahead and freeze it in a well-sealed container.
- Decorate before the chocolate sets: If you’re adding chopped peanuts or a little flaky salt, sprinkle the toppings on while the coating is still wet.
Making them ahead allows the flavors to settle and gives you more time to focus on other dishes when entertaining.
Frequently Asked Questions
1. Do Peanut Butter Balls Need to Be Refrigerated?
Refrigeration is recommended to maintain the texture and freshness of the peanut butter filling. Store them in an airtight container in the refrigerator, especially if your recipe contains butter.
2. Can I Make Peanut Butter Balls Without Baking?
Yes. This is a no-bake recipe. The filling is mixed, shaped, chilled, and dipped in melted chocolate without using an oven.
3. Why Is My Peanut Butter Filling Too Soft?
The mixture may contain too much oil or not enough powdered sugar. Add a little more powdered sugar until the filling is firm enough to roll, then chill the shaped balls before dipping.
4. Can I Use Crunchy Peanut Butter?
Yes. Crunchy peanut butter adds small peanut pieces and a pleasant texture. However, creamy peanut butter generally produces a smoother, more uniform filling.
5. What Is the Best Chocolate for Coating Peanut Butter Balls?
Semi-sweet chocolate is a popular choice because it balances the sweet filling. Milk chocolate gives a sweeter finish, while dark chocolate creates a richer cocoa flavor.
6. How Can I Make the Chocolate Coating Smoother?
Melt the chocolate slowly, stirring frequently. If the chocolate is too thick, mix in a small amount of coconut oil until it reaches a fluid consistency. Avoid adding water, which can cause melted chocolate to seize.
7. Can I Make Peanut Butter Balls Without Butter?
Butter contributes richness and helps create a smooth filling. You may be able to substitute a suitable solid baking fat, but the texture and flavor can change. Because the butter is part of the filling’s structure, replacing it may require adjusting the powdered sugar.
8. Can I Freeze Peanut Butter Balls?
Yes. Freeze them in an airtight, freezer-safe container, separating the layers with parchment paper. For the best quality, use them within 2–3 months.
9. Why Does My Chocolate Coating Look Dull?
Chocolate may look dull if it was overheated, cooled unevenly, or exposed to condensation. Melt it gently and allow the coating to set in a cool, dry environment before refrigerating the finished candies.
10. How Do I Prevent the Chocolate from Cracking?
Chill the centers until firm but avoid freezing them for too long before dipping. Let the melted chocolate cool slightly, and allow the coating to set without sudden temperature changes.
11. Can I Make Peanut Butter Balls for a Party?
Absolutely. Their small size makes them ideal for parties and dessert tables. Prepare them in advance, store them in the refrigerator, and arrange them on a platter shortly before serving.
12. Can I Make These Peanut Butter Balls Nut-Free?
Traditional peanut butter balls contain peanuts, so they are not suitable for people with peanut allergies. For a nut-free alternative, use a seed butter such as sunflower seed butter, provided it is safe for the intended guests. The texture may vary, and the ingredient label should be checked for allergen and cross-contact information.
Expert Tips for the Best Peanut Butter Balls
For the most delicious results, keep these simple recommendations in mind:
- Use creamy peanut butter with a consistent texture.
- Make sure the butter is softened before mixing.
- Add powdered sugar gradually to control the filling’s consistency.
- Chill the balls until firm before dipping.
- Melt the chocolate gently and stir frequently.
- Let excess chocolate drip off for a neat coating.
- Allow the chocolate to set completely before storing.
- Keep the finished candies in an airtight container.
Final Thoughts
These Peanut Butter Balls prove that a delicious homemade dessert doesn’t need to be complicated. With a creamy peanut butter center, a rich chocolate coating, and no baking required, they’re an easy treat for beginners and experienced home cooks alike.
Make a batch for your next holiday gathering, package them as homemade gifts, or keep a few in the refrigerator for whenever you want something sweet.
The combination of nutty peanut butter and smooth chocolate creates a timeless candy that’s simple to prepare, easy to share, and always satisfying.