
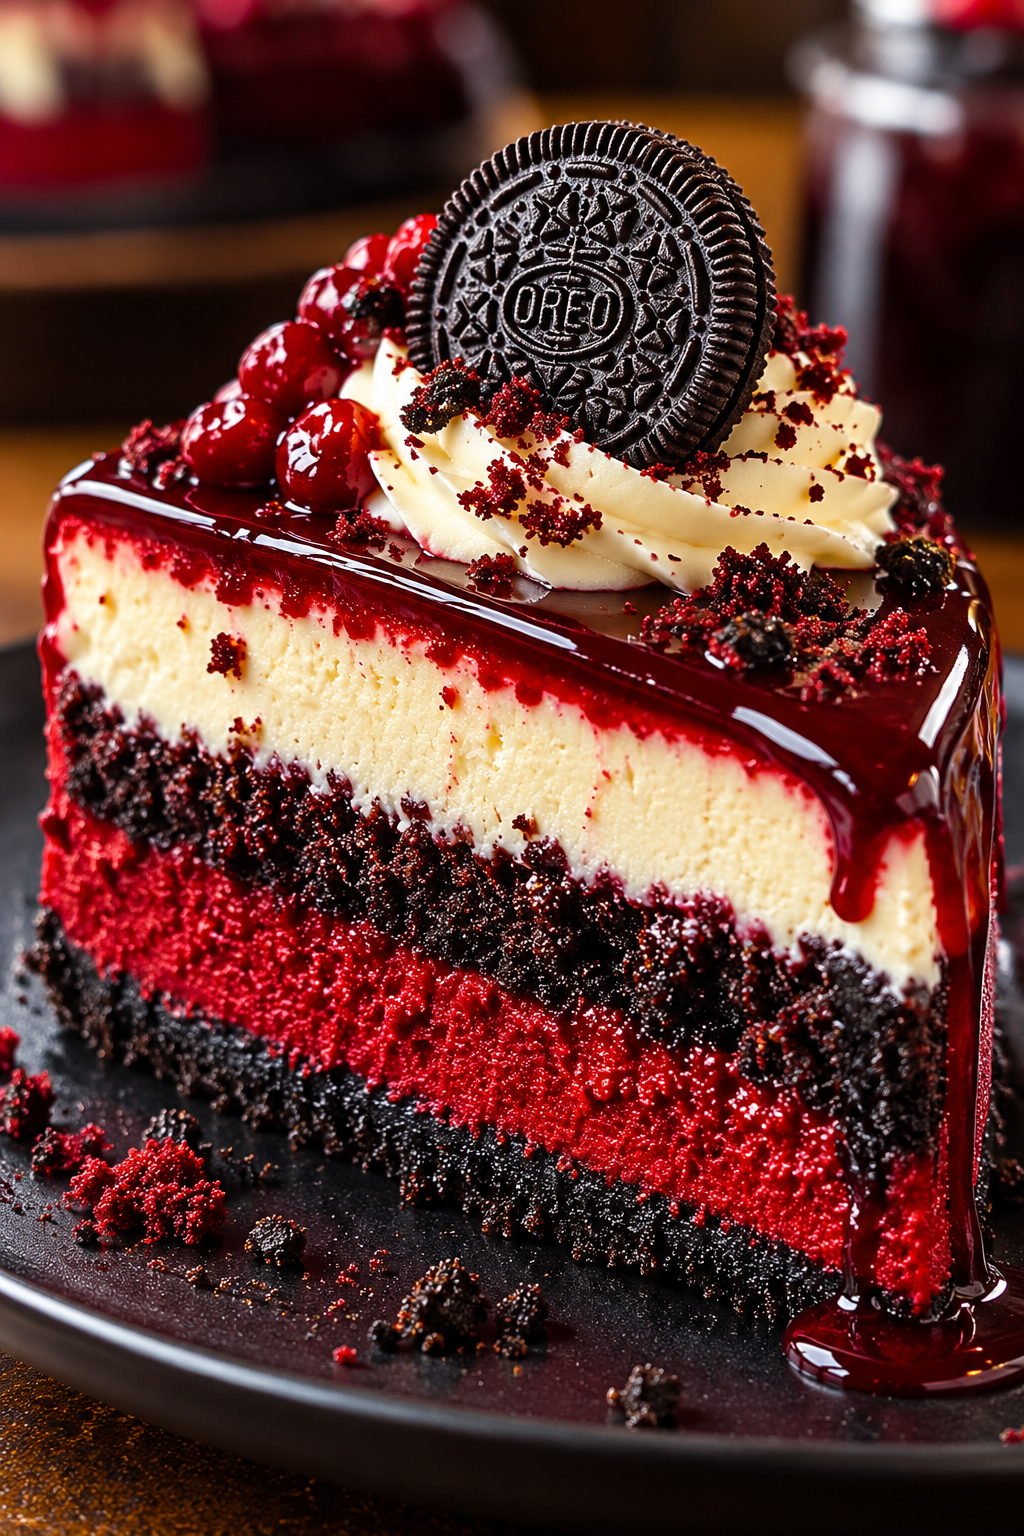
Red Velvet Oreo Cheesecake:
Introduction
If you love the rich flavor of red velvet cake and the irresistible crunch of Oreo cookies, this Red Velvet Oreo Cheesecake is the dessert you need to try. With its beautiful red color, creamy cheesecake filling, chocolate cookie crust, and decadent Oreo pieces, this dessert combines two classic favorites into one unforgettable treat.
Perfect for holidays, birthdays, Valentine’s Day, or any special occasion, this cheesecake looks impressive on the table while delivering the rich, creamy texture that cheesecake lovers crave. Every slice offers a delicious combination of tangy cream cheese, subtle cocoa flavor, and crunchy chocolate cookies.
Best of all, you can prepare this dessert ahead of time, making it a convenient choice when you want a homemade dessert that feels extra special.
What Is Red Velvet Oreo Cheesecake?
Red Velvet Oreo Cheesecake is a rich dessert that combines the flavors of traditional red velvet cake with classic cookies-and-cream cheesecake. It typically features an Oreo cookie crust topped with a smooth red velvet cheesecake filling made with cream cheese, sugar, cocoa powder, eggs, and a touch of vanilla.
Crushed Oreo cookies add chocolate flavor and texture throughout the filling, while a topping of whipped cream, Oreo crumbs, or whole cookies makes the finished cheesecake even more appealing.
Unlike a traditional red velvet cake, this dessert has the dense, velvety texture of cheesecake. The combination of mild cocoa, creamy cheese, and chocolate cookies creates a balanced flavor that is sweet, rich, and satisfying without relying on frosting alone.
Why You’ll Love This Red Velvet Oreo Cheesecake
- Two favorite desserts in one: Enjoy the classic taste of red velvet cake combined with the chocolatey goodness of Oreo cookies.
- Rich and creamy texture: Cream cheese creates a smooth, luxurious filling with a delicate tang.
- A crunchy chocolate crust: The Oreo base adds a delicious contrast to the soft cheesecake filling.
- Beautiful presentation: The vibrant red center and dark cookie crust create an eye-catching dessert for celebrations.
- Perfect for making ahead: Chilling the cheesecake allows the filling to set properly and gives the flavors time to develop.
- Easy to customize: Add whipped cream, chocolate drizzle, extra Oreo pieces, or cream cheese frosting to make it your own.
The Red Velvet Cheesecake Filling
The filling combines cream cheese, sugar, eggs, vanilla, and a small amount of cocoa powder to create a smooth cheesecake with the familiar flavor of red velvet.
Red food coloring gives the filling its signature appearance, while the cream cheese adds a gentle tang that balances the sweetness. Mixing the ingredients carefully helps achieve a silky texture without incorporating too much air.
The Oreo Pieces
Crushed Oreo cookies throughout the cheesecake provide little pockets of chocolate cookie flavor in every slice. For the best texture, use a mixture of small crumbs and slightly larger pieces rather than grinding all the cookies into a fine powder.
The Creamy Topping
A topping of whipped cream, Oreo crumbs, or cream cheese frosting gives the cheesecake a polished finish. You can also add whole Oreo cookies around the edge for a dessert that looks ready for a celebration.
Ingredients That Bring It All Together
This recipe uses familiar baking ingredients that work together to create its signature flavor and texture.
- Oreo cookies: Provide the chocolate cookie crust and extra crunch in the filling.
- Cream cheese: Creates the rich, smooth, slightly tangy cheesecake base.
- Granulated sugar: Sweetens the filling and balances the cocoa and cream cheese.
- Eggs: Help the cheesecake set and give it structure.
- Unsweetened cocoa powder: Adds a subtle chocolate flavor that complements the red velvet profile.
- Red food coloring: Creates the vibrant red appearance associated with red velvet desserts.
- Vanilla extract: Enhances the sweetness and rounds out the flavors.
- Sour cream: Adds moisture and a gentle tang for a more balanced filling.
- Unsalted butter: Binds the crushed Oreo cookies into a firm crust.
- Heavy whipping cream: Can be used to prepare a light, creamy topping.
The exact quantities and ingredient substitutions will be covered in Part 2.
When to Serve Red Velvet Oreo Cheesecake
This cheesecake is versatile enough for many occasions. Its bold color and chocolate-cookie layers make it especially suitable for:
- Valentine’s Day dinners and romantic celebrations
- Christmas parties and holiday dessert tables
- Birthday parties and family gatherings
- Mother’s Day and special celebrations
- Potlucks, dinner parties, and weekend desserts
- Any occasion when you want an impressive make-ahead treat
Because the cheesecake needs several hours to chill, it is an excellent dessert to prepare the day before an event.
What to Expect From This Recipe
Once chilled, the cheesecake should have a firm yet creamy filling, a sturdy Oreo crust, and a beautiful red interior dotted with chocolate cookie pieces. The cocoa flavor should be noticeable but not overpowering, allowing the cream cheese and Oreo cookies to remain the stars of the dessert.
For the best results, use room-temperature cream cheese, mix the batter gently, and allow the cheesecake to cool gradually before refrigerating it. These simple steps help create a smoother filling and reduce the risk of cracks.
The final result is a decadent, bakery-style dessert with a rich chocolate-cookie base, a velvety red cheesecake center, and an optional creamy topping that makes every slice feel special.
Red Velvet Oreo Cheesecake:
Ingredients, Measurements, and Helpful Tips
The secret to a delicious Red Velvet Oreo Cheesecake is using the right balance of creamy, chocolatey, and sweet ingredients. The Oreo crust provides a crunchy foundation, while the red velvet cheesecake filling stays rich, smooth, and full of flavor.
Follow these ingredient measurements for a cheesecake that is perfect for celebrations, holidays, or a special homemade dessert.
Ingredients for Red Velvet Oreo Cheesecake
Yield: 12–14 slices Pan size: 9-inch springform pan
For the Oreo Cookie Crust
- 24 Oreo cookies, including the filling
- 5 tablespoons unsalted butter, melted
For the Red Velvet Cheesecake Filling
- 24 ounces (680 g) full-fat cream cheese, softened to room temperature
- 1 cup (200 g) granulated sugar
- 3 large eggs, at room temperature
- 1/2 cup (120 g) sour cream, at room temperature
- 1/4 cup (25 g) unsweetened cocoa powder
- 1 tablespoon vanilla extract
- 1 tablespoon red food coloring, or as needed for your preferred shade
- 1 tablespoon all-purpose flour
- 12 Oreo cookies, roughly chopped
For the Optional Cream Cheese Topping
- 4 ounces (113 g) cream cheese, softened
- 1/2 cup (60 g) powdered sugar
- 1/2 cup (120 ml) cold heavy whipping cream
- 1/2 teaspoon vanilla extract
- 4–6 Oreo cookies, crushed or halved, for decoration
Ingredient Notes and Substitutions
Oreo Cookies
Regular Oreo cookies work best for this recipe because their chocolate wafers complement the red velvet filling. Keep the filling inside when crushing the cookies for the crust.
You can use another chocolate sandwich cookie if needed, but the flavor and sweetness may vary.
Cream Cheese
Full-fat block cream cheese is the best choice for a thick, creamy cheesecake. Avoid whipped cream cheese or spreadable varieties, as they may contain more moisture and produce a softer filling.
If possible, let the cream cheese sit at room temperature for about 45–60 minutes before mixing.
Sour Cream
Sour cream adds moisture and a subtle tang that balances the sweetness of the cookies and sugar.
If necessary, substitute an equal amount of full-fat plain Greek yogurt. The texture and flavor may be slightly different.
Cocoa Powder
Unsweetened cocoa powder gives the filling its mild chocolate flavor. Natural unsweetened cocoa powder works well, while Dutch-process cocoa can also be used for a deeper, smoother chocolate taste.
Measure the cocoa carefully. Too much can make the cheesecake taste more like chocolate cheesecake than red velvet.
Red Food Coloring
Liquid or gel food coloring can be used. Gel coloring is more concentrated, so you may need less to achieve a vibrant red color.
Add the coloring gradually until the filling reaches your preferred shade. The final color may look slightly darker after baking.
Eggs
Use large eggs at room temperature. Add them one at a time and mix on low speed just until incorporated. Overmixing after adding the eggs can introduce excess air, increasing the risk of cracks.
Heavy Whipping Cream
For the optional topping, use cold heavy whipping cream so it whips properly. If you prefer a simpler finish, decorate the cheesecake with whipped cream from a can or sprinkle crushed Oreo cookies over the top.
Helpful Tips for the Best Results
- Use room-temperature ingredients: Softened cream cheese and room-temperature eggs blend more smoothly and help prevent lumps.
- Avoid overmixing: Mix the batter until smooth, then stop. Too much air can cause the cheesecake to puff up and crack as it cools.
- Prepare the crust properly: Press the Oreo mixture firmly and evenly into the bottom of the springform pan.
- Don’t overbake: The edges should look set while the center retains a slight wobble. The cheesecake will continue to set as it cools.
- Cool gradually: Let the cheesecake cool gently before refrigerating it to reduce sudden temperature changes.
- Chill thoroughly: Refrigerate for at least 6 hours, preferably overnight, before slicing.
- Use a warm knife: Dip a sharp knife in warm water and wipe it clean between slices for neat edges.
Make-Ahead Preparation
Red Velvet Oreo Cheesecake is an excellent make-ahead dessert because it needs time to chill before serving.
The day before serving: Prepare and bake the cheesecake, let it cool, and refrigerate it covered once completely cooled. Add the decorative topping before serving for the freshest appearance.
A few hours ahead: Prepare the cream cheese topping and keep it refrigerated until you’re ready to decorate.
Before guests arrive: Remove the cheesecake from the refrigerator shortly before slicing, just long enough to make cutting easier without leaving it at room temperature for an extended period.
With your ingredients measured and prepared, you’re ready to make the Oreo crust and creamy red velvet filling.
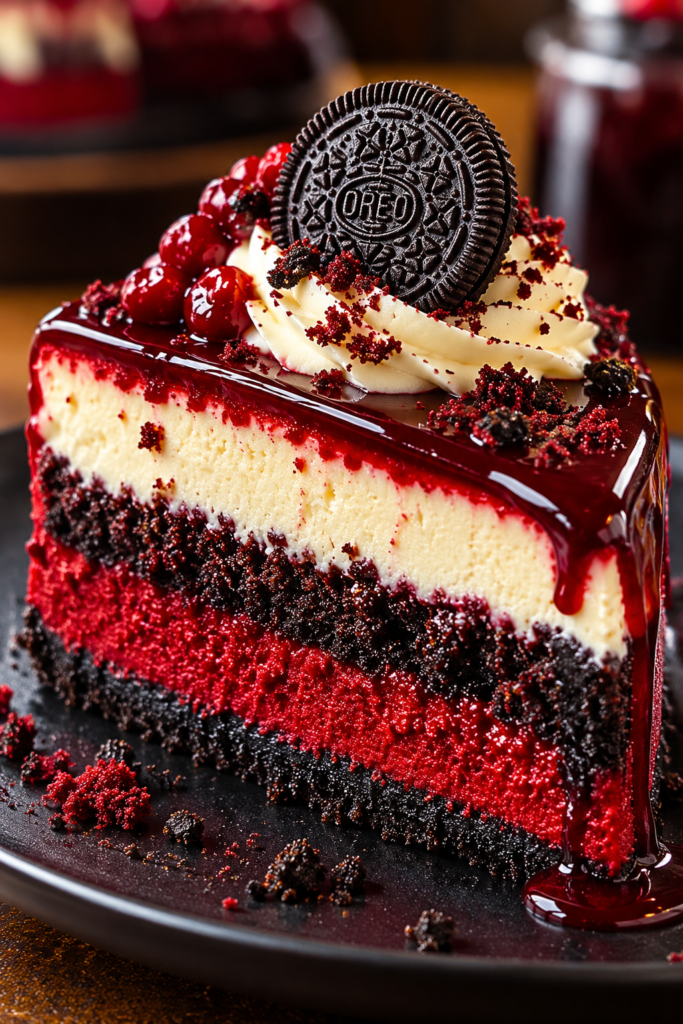
Red Velvet Oreo Cheesecake:
Step-by-Step Instructions:
Making Red Velvet Oreo Cheesecake at home is easier than it looks. The key is to prepare a firm cookie crust, mix the filling gently, and give the cheesecake enough time to bake and chill. Follow these steps for a creamy, beautiful cheesecake with the perfect combination of red velvet flavor and crunchy Oreo cookies.
Prepare the Oven and Pan
Preheat your oven to 325°F (163°C). Lightly grease a 9-inch springform pan and line the bottom with parchment paper if desired.
Make sure the cream cheese, eggs, and sour cream have reached room temperature. This helps the ingredients combine smoothly and prevents lumps in the filling.
Make the Oreo Cookie Crust
Place 24 Oreo cookies, including their cream filling, in a food processor and pulse until they become fine crumbs. If you don’t have a food processor, place the cookies in a sealed plastic bag and crush them with a rolling pin.
Transfer the crumbs to a bowl and stir in the melted butter until the mixture resembles wet sand.
Press the mixture firmly into the bottom of the prepared springform pan, creating an even layer. Use the bottom of a measuring cup to compact the crust.
Bake for 8–10 minutes, then remove the pan from the oven and let the crust cool slightly while you prepare the filling.
Beat the Cream Cheese and Sugar
In a large mixing bowl, beat the softened cream cheese with an electric mixer on medium-low speed until smooth and creamy.
Add the granulated sugar and continue mixing until fully combined. Scrape down the sides and bottom of the bowl as needed to ensure there are no lumps.
Avoid beating the mixture too vigorously. A smooth, gently mixed base helps create a dense and creamy cheesecake.
Add the Cocoa Powder and Flavorings
Sift the unsweetened cocoa powder into the cream cheese mixture to remove any lumps. Add the vanilla extract, red food coloring, sour cream, and all-purpose flour.
Mix on low speed until the ingredients are evenly incorporated and the filling has a consistent red color.
Adjust the food coloring gradually if you want a deeper red shade. Remember that the color may change slightly during baking.
Incorporate the Eggs
Add the eggs one at a time, mixing on low speed after each addition until just combined.
Scrape the sides of the bowl to ensure everything is evenly mixed. Stop as soon as the batter is smooth.
Overmixing at this stage can introduce excess air into the filling, which may cause the cheesecake to rise too much and crack as it cools.
Fold in the Oreo Pieces
Roughly chop 12 Oreo cookies into small pieces. Add them to the cheesecake batter and gently fold them in with a spatula.
Try to keep a mixture of small crumbs and larger cookie pieces for the best texture. This gives the cheesecake little pockets of chocolate cookie flavor throughout the red velvet filling.
Pour the batter over the prepared Oreo crust and smooth the top with a spatula.
Bake the Cheesecake
Place the springform pan on the middle rack of the preheated oven.
Bake for approximately 55–70 minutes, checking toward the end of the baking time. The edges should look set, while the center should still have a slight wobble when you gently move the pan.
Avoid opening the oven frequently, as sudden temperature changes can affect the texture.
If the top begins to brown too much, loosely cover it with aluminum foil. Do not worry if the center looks slightly soft; it will continue to set as the cheesecake cools.
Cool the Cheesecake Gradually
Turn off the oven and leave the cheesecake inside with the oven door slightly open for about 30 minutes.
Remove the cheesecake and place it on a wire rack to cool to room temperature. Run a thin knife around the inside edge of the pan to help prevent the cheesecake from sticking to the sides as it contracts.
Once cooled, cover the pan and refrigerate the cheesecake for at least 6 hours, preferably overnight.
Important: Do not rush the chilling process. Adequate refrigeration helps the cheesecake firm up, develop its flavor, and slice cleanly.
Prepare the Cream Cheese Topping
If you want an extra-creamy finish, prepare the optional topping shortly before decorating.
In a bowl, beat the softened cream cheese with the powdered sugar and vanilla extract until smooth.
In a separate chilled bowl, whip the cold heavy cream until it forms medium-to-stiff peaks. Gently fold the whipped cream into the cream cheese mixture until smooth and fluffy.
If you prefer a simpler dessert, you can skip this topping and decorate the cheesecake with crushed Oreo cookies instead.
Decorate the Cheesecake
Once the cheesecake is thoroughly chilled, carefully release the sides of the springform pan.
Spread or pipe the cream cheese topping over the surface. Sprinkle crushed Oreo cookies over the top, or arrange halved cookies around the edges for a more decorative finish.
For an extra indulgent touch, drizzle a little melted chocolate over the topping.
Keep the decoration balanced so the red velvet filling remains visible when the cheesecake is sliced.
Slice and Serve
For clean slices, dip a sharp knife into warm water and wipe it dry before cutting. Repeat between slices to keep the edges neat.
Serve the cheesecake chilled, allowing the rich cream cheese filling, chocolate Oreo crust, and red velvet flavor to shine.
It pairs beautifully with coffee, tea, or a cold glass of milk.
Extra Tips for Perfect Results
- Prevent a crumbly crust: Press the cookie mixture firmly into the pan before baking.
- Avoid lumps: Make sure the cream cheese is fully softened before mixing.
- Keep the color vibrant: Use enough red food coloring to achieve your preferred shade, but add it gradually.
- Prevent cracks: Mix gently, avoid overbaking, and cool the cheesecake gradually.
- Get neat slices: Chill overnight and clean the knife between cuts.
- Decorate at the right time: Add whipped topping and Oreo decorations once the cheesecake is completely cool.
Your Red Velvet Oreo Cheesecake is now ready to chill, decorate, and serve. The finished dessert should have a firm chocolate cookie crust, a creamy red center, and plenty of Oreo flavor in every bite.
Red Velvet Oreo Cheesecake:
Storage, Serving Ideas, Variations, and FAQs:
Red Velvet Oreo Cheesecake is a rich, creamy dessert that tastes even better after it has had enough time to chill. The Oreo crust, velvety red cheesecake filling, and optional cream cheese topping make it a wonderful choice for birthdays, holidays, and special gatherings.
With the right storage methods and a few simple variations, you can enjoy this cheesecake for several days or prepare it ahead of time for your next celebration.
How to Store Red Velvet Oreo Cheesecake
Refrigerating Leftovers
Store leftover cheesecake in an airtight container or cover the springform pan tightly with plastic wrap or foil. Refrigerate for up to 5 days for the best quality.
Keep the cheesecake refrigerated between servings, especially if it has a cream cheese or whipped cream topping. For food safety, avoid leaving it at room temperature for more than 2 hours.
Can You Freeze Red Velvet Oreo Cheesecake?
Yes! This cheesecake freezes well, making it a convenient make-ahead dessert.
- Allow the cheesecake to chill completely in the refrigerator.
- For easier handling, freeze it briefly until firm.
- Wrap the cheesecake or individual slices tightly in plastic wrap, followed by aluminum foil.
- Place the wrapped portions in a freezer-safe container or bag.
- Freeze for up to 2 months for the best quality.
For the best texture, freeze the cheesecake without the decorative whipped topping when possible. Add fresh topping and Oreo decorations after thawing.
How to Thaw Frozen Cheesecake
Transfer the frozen cheesecake to the refrigerator and allow it to thaw overnight. Individual slices may thaw more quickly, depending on their size.
Avoid thawing cheesecake on the counter for extended periods. Once thawed, keep it refrigerated and enjoy it within 3–4 days.
What to Serve with Red Velvet Oreo Cheesecake
This cheesecake is delicious on its own, but the right accompaniment can make each slice feel even more special.
1. Fresh Strawberries
Fresh strawberries add a bright, fruity contrast to the rich cream cheese filling. Arrange a few sliced strawberries beside each serving or use them as a garnish.
2. Chocolate Drizzle
Drizzle melted dark or milk chocolate over each slice for an extra layer of chocolate flavor. Dark chocolate is especially good if you want to balance the sweetness of the Oreo cookies.
3. Whipped Cream
A spoonful of lightly sweetened whipped cream adds a soft, airy texture that complements the dense cheesecake.
4. Vanilla Ice Cream
Serve a slice with a small scoop of vanilla ice cream for an indulgent dessert combination. The cool, creamy ice cream pairs beautifully with the chocolate cookie crust.
5. Coffee or Espresso
The slightly bitter notes of coffee balance the sweetness of the cheesecake. Serve it with freshly brewed coffee or espresso after dinner.
6. Raspberry Sauce
A homemade raspberry sauce adds a tart, fruity flavor that contrasts with the rich red velvet filling. Spoon a little onto the plate before adding the cheesecake slice.
Delicious Variations to Try
One of the best things about this recipe is how easily you can customize it to suit your preferences.
Red Velvet Oreo Cheesecake Bars
Instead of using a round springform pan, prepare the cheesecake in a suitable square baking pan lined with parchment paper. Once baked and thoroughly chilled, cut it into squares or bars.
This variation is ideal for potlucks, parties, and dessert trays.
No-Bake Red Velvet Oreo Cheesecake
For a no-bake version, prepare the Oreo crust as directed and chill it until firm. Make a cheesecake filling using softened cream cheese, powdered sugar, vanilla, red food coloring, and whipped cream, then spread it over the crust.
Refrigerate until fully set, preferably overnight. Because this version does not contain baked eggs, it will have a lighter, mousse-like texture rather than the dense texture of baked cheesecake. Use an appropriate no-bake recipe with measured setting ingredients if you need especially firm slices.
White Chocolate Red Velvet Oreo Cheesecake
Melt white chocolate, let it cool slightly, and mix it into the cream cheese filling before adding the eggs. This creates a sweeter, richer cheesecake with a subtle white chocolate flavor.
Reduce the added sugar slightly if you prefer a less sweet dessert.
Mini Red Velvet Oreo Cheesecakes
Divide the Oreo crust and filling among a lined muffin tin to make individual cheesecakes. Reduce the baking time and begin checking for doneness early, as smaller portions bake much faster than a full-size cheesecake.
Mini cheesecakes are convenient for parties because guests can enjoy individual servings.
Red Velvet Cheesecake with Chocolate Ganache
For an extra-decadent finish, pour a thin layer of cooled chocolate ganache over the chilled cheesecake. Let the ganache set before adding Oreo crumbs or whipped cream.
The smooth chocolate topping complements the cocoa flavor of the red velvet filling.
Extra Cookies-and-Cream Cheesecake
If you love Oreo cookies, add a few more chopped cookies to the filling and sprinkle additional crumbs over the topping. Avoid adding too many, however, as excessive cookie pieces can make the filling harder to slice neatly.
Frequently Asked Questions
Why did my Red Velvet Oreo Cheesecake crack?
Cracks can develop when the cheesecake is overmixed, overbaked, or cooled too quickly. Mix the eggs gently, remove the cheesecake when the center still has a slight wobble, and allow it to cool gradually.
If a crack does appear, cover it with whipped cream, cream cheese topping, or crushed Oreo cookies.
How do I know when the cheesecake is done?
The edges should look set, while the center should still move slightly when you gently shake the pan. It will firm up as it cools and chills.
Avoid baking until the center is completely rigid, as this can result in a dry texture.
Can I make this cheesecake the day before serving?
Absolutely. In fact, making it a day ahead is recommended. Overnight refrigeration helps the filling set properly and makes slicing easier. Add the decorative topping shortly before serving for the freshest appearance.
Can I use a different cookie for the crust?
Yes. Chocolate sandwich cookies or plain chocolate wafer cookies can work well. If you use cookies without a cream filling, you may need to adjust the amount of melted butter to achieve a mixture that holds together when pressed.
Why is my cheesecake filling lumpy?
The most common reason is cream cheese that is too cold. Let it soften at room temperature before mixing, and beat it until smooth before adding the remaining ingredients.
If the cream cheese is still lumpy, avoid adding the eggs until you have worked out as many lumps as possible.
Can I make this recipe without red food coloring?
Yes. You can omit the coloring, although the cheesecake will have a light chocolate or cocoa-colored appearance rather than the classic red velvet color.
The cocoa, vanilla, and cream cheese will still create a delicious cheesecake.
How do I get clean cheesecake slices?
Chill the cheesecake thoroughly before cutting. Use a long, sharp knife dipped in warm water, wiping the blade clean between each slice.
For the neatest presentation, cut slowly rather than pressing down too hard.
Can I use low-fat cream cheese?
Full-fat block cream cheese is recommended for the richest flavor and firmest texture. Low-fat or spreadable cream cheese may contain more moisture and can produce a softer filling.
If you use a lower-fat variety, expect some differences in texture and richness.
Is Red Velvet Oreo Cheesecake suitable for special occasions?
Yes. Its vibrant red filling, dark chocolate crust, and decorative Oreo topping make it especially suitable for Valentine’s Day, Christmas, birthdays, anniversaries, and holiday parties.
Final Thoughts
Red Velvet Oreo Cheesecake brings together the best parts of two beloved desserts: the subtle cocoa flavor and vibrant color of red velvet, and the chocolatey crunch of Oreo cookies. The result is a rich, creamy cheesecake that looks impressive and tastes even better after chilling overnight.
With a buttery Oreo crust, smooth cream cheese filling, and optional whipped cream or chocolate topping, this recipe is easy to customize for any occasion.
Prepare it ahead of time, keep it chilled until serving, and decorate it with your favorite toppings for a beautiful homemade dessert. Whether you’re making it for a holiday gathering or simply treating yourself to something special, this Red Velvet Oreo Cheesecake is a delicious way to make dessert memorable.